To setup a product navigate to the Seller Dashboard. Click on “Products” from the menu on the left, then click on the “Add new product” tab on the top right corner.
The basic information about a product includes the product’s name, price, description and the product’s image.
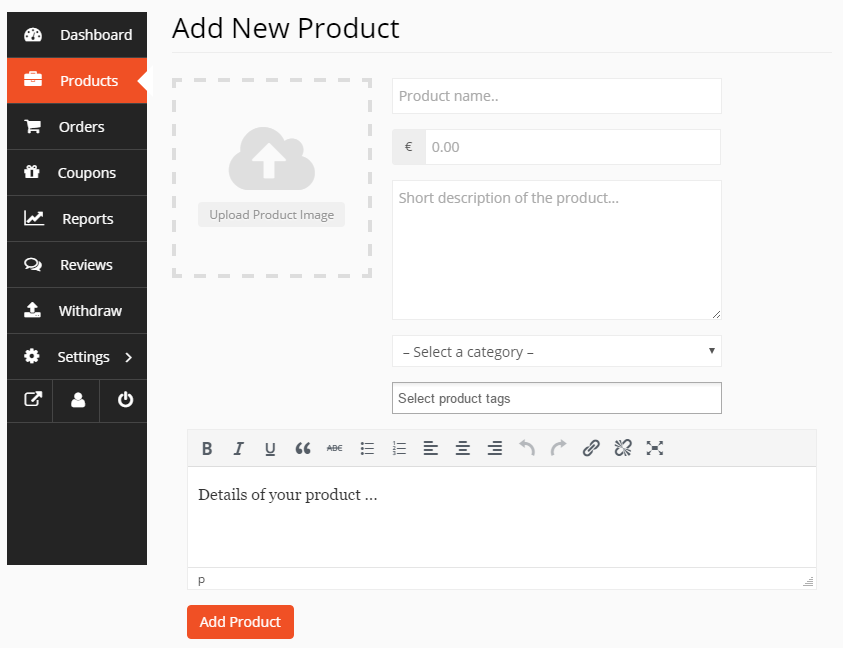
- Product Image: A 600 x 600 pixels high quality image on a plane background is recommended.
- Product Category: Your products must be sorted into different distinct categories. The category selection is singular in the dropdown field. In the case of you needing to show your products based on multiple factors, searching optimizations or sorting features, the use of tags is possible.
- Tags: Type in 3 or more characters of an intended tag, then the complete tag appears below -just like in the case of a Google search. Let us assume that you need to add a tag named “wood”, typing “woo” alone will provide the “Wood” option. Then hit the down arrow ↓ on the keyboard or click on the result to add that in the field. If your desired tags are not available in the dropdown list, please contact AfricShopping for the inclusion of your tags.
- Product details: It is recommended that you write full a description of your product in the provided box in order to help the buyers make the right decision when buying.
When creating new products, it should be noted that discount prices and other details about the products can only be added after clicking on the “Add Product” button.
To edit an existing product, navigate to “Seller Dashboard”, click on “Products”, then you can see a list of all your products. Place the cursor on the name of the product you intend to edit, the edit button will appear, then you can click this button to edit.
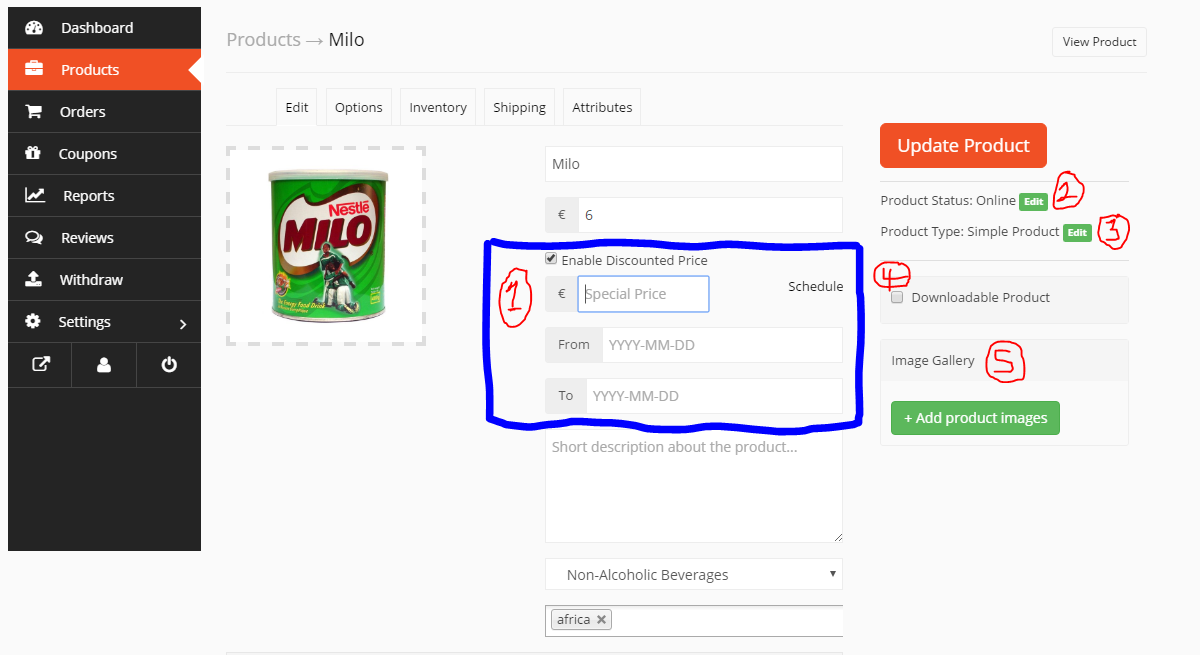
- Discount Price: It is possible for sellers to schedule discounts for a certain period of time, by simply entering a starting and ending date .
- Product Status: sellers can set the status of their products to either “online” or “draft”. However, it should be noted that only products with “online” status will be seen by the customers.
- Product Type: Every item to be sold will be either a “simple” or “variable” product. Simple products are those products that are available in one single colour or size, while variable products are products with variable features for instance fashion products with different colours and sizes. If your products don’t fall under fashion category, then they are probably “simple” products. Therefore, it is recommended that you keep “simple product” option, which is the default setting.
To set variable products you need to change the product type to “Variable product”, then additional tab named “Variations” will be added. But before you proceed to “variations” tab, you first need to add and save attributes of your products such as weights, sizes, colours, etc. by clicking on “Attributes” tab. After then, you can click on “Variations” tab to enter your products details. Read more on how to list variable products under “Attributes” and “Variations” in this guide.
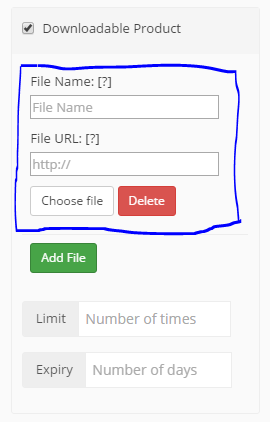
- Downloadable Product: This is the option to use, if you are selling e-books, Audios, photos, software or other digital products. By clicking on the downloadable product button, extra boxes will appear with which you can upload and add your products’ details. It is also possible to set the number of times a product can be downloaded after purchase and when the download access expires.
- Image gallery: Additional product’s images can be uploaded through this button.
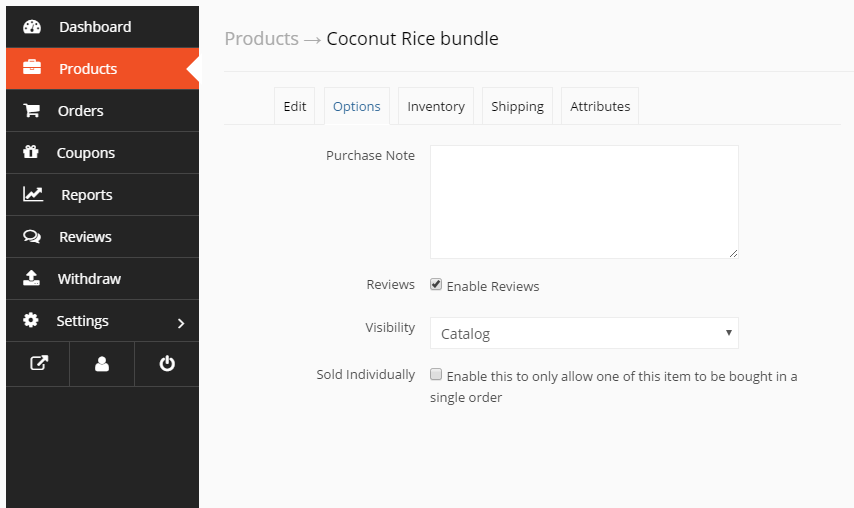
- Purchase Note: If you want the customer to receive a custom message right after purchasing the product, you can write this in the box provided here.
- Reviews: Here you can enable or disable reviews for a particular product.
- Visibility: The visibility option defines the privacy settings of a product. By default, “Catalogue and Search” is selected. But if you want a product to only appear on the category listing page, search results list or want to list it as a hidden product, then you can select these options respectively. Hiding a product can be an option if you are out of stock and you are not making use of the stock management option. This way, you don’t have to list the product again once you have it back in stock but simply change the status.
If you select any other option apart from the Catalogue and Search option, the product will not appear on the site. It will appear only on the store’s page.
- Sold Individually: Enable this to allow only one of a particular product to be bought in a single order
If you would like to manage your stock, this is the section to do just that.
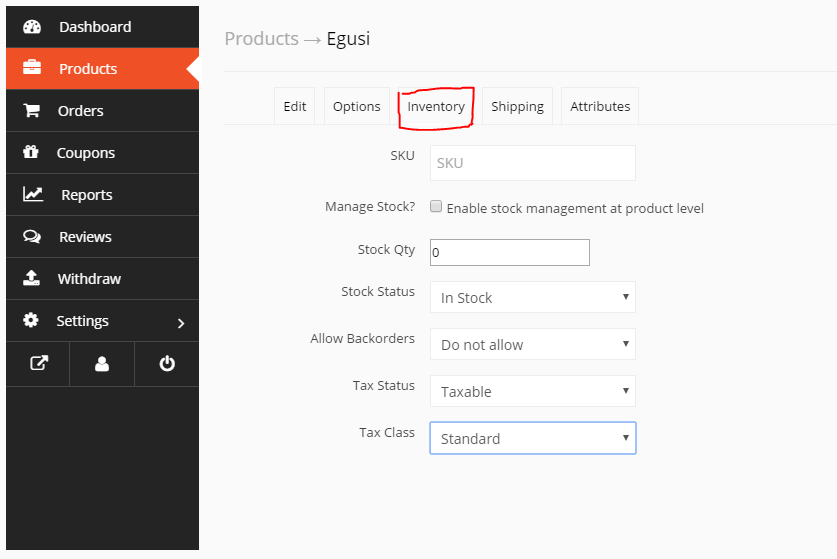
What is SKU?
SKU stands for Stock Keeping Unit. It should be a unique set of characters which will not match to any other product.
Enable Product Stock Management
Let us say you have 10 pieces of a product left and you do not wish to receive more orders after orders have been placed for the 10 units. After stock management is enabled, enter 10 in the quantity field. Once all 10 units have been ordered, this product will display a message stating that all the quantities are sold and it is presently out of stock. But, you might wish to take some pre-orders before your next batch of stocks becomes available. Therefore, you can Allow Back Order to let the customers place orders even when the product is out of stock.
If you enabled the main shipping feature and configured the shipping costs under Dashboard -> Settings -> Shipping. , you might want to apply it to all your products. If this is the case, there is no need to input any data into this section because these shipping costs are applied if you do not add any shipping cost to your product. Sometimes though, you may need to override the pre-set shipping costs for a particular product. For this reason, the shipping override feature was included.
To use this feature:
For existing products – Navigate to Dashboard -> Products -> Edit and navigate to the shipping tab.
For newly created products – Dashboard -> Products -> Add new product -> on the next display screen after adding the basic product information, navigate to the shipping tab.
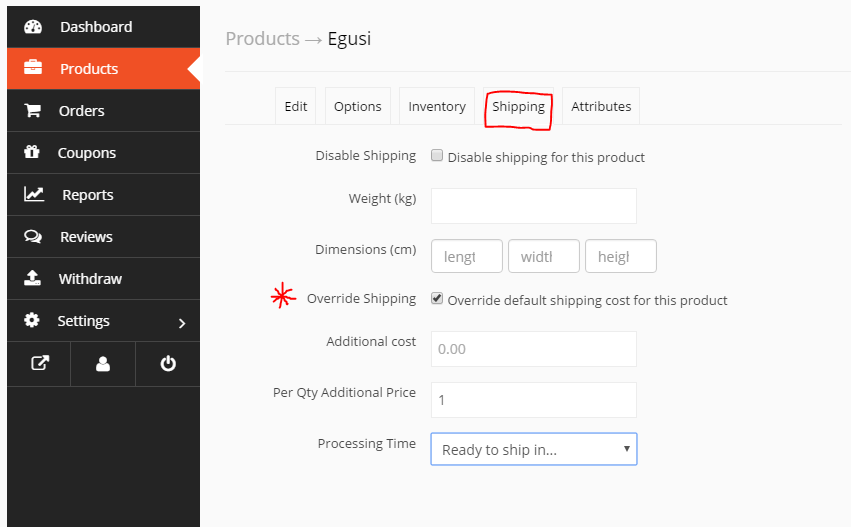
Check the override shipping option as shown above, then you will be able to include additional shipping cost for this product. You can enter either a positive or a negative value based on your need. For example, if the product shipping price should be less than the preset price, you can place a minus value
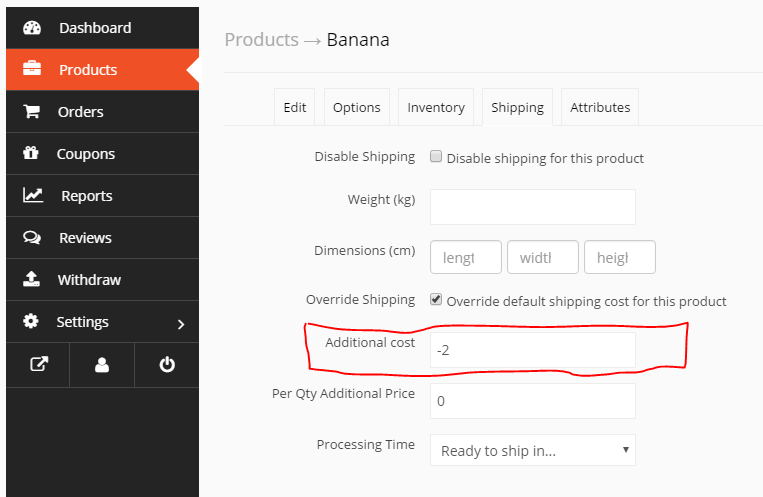
For example, if your base shipping price is set to 5€ but for Bananas, the base shipping price should be 3€. Therefore, you can write -2 in Additional Cost as shown above.
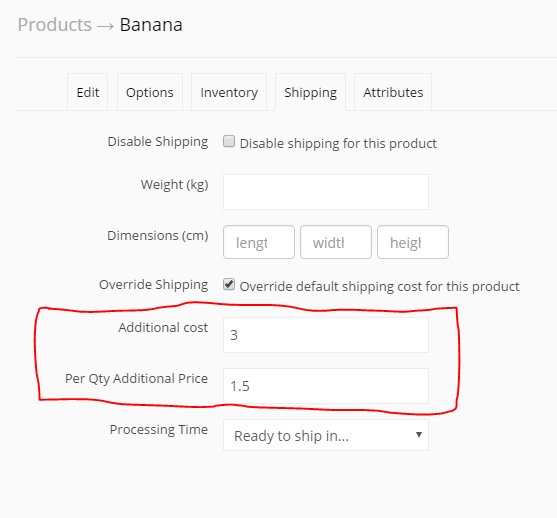
Considering the above screenshot, it means that, if you have set a base shipping price of 5€ and an additional cost of 3€ here, the base shipping price for that product will be 8€.
And all the prices for the states will be after that. So if you have set 2€ for Berlin, Germany; then the total cost for delivering the product to Berlin, Germany would be in total 8€ + 2€ = 10€.
Multiple quantities
Quantity: 5
Base Shipping Price: 5€ + 3€ (Additional cost from override) = 8€
Per Quantity Additional Price: 1.5€ (from override) = 1.5€
Berlin, Germany: 2€
So the total shipping cost for 5 products to Berlin would be (8×1) + (1.5×4) + (2) = 16€
This section is not necessary for you if your product is a simple product. Therefore, you can skip this section. In the case that you are creating a variable downloadable product or selling a dress, t-shirt or shoes, with multiple sizes or colours then you should read this section carefully.
Adding a variable product
To add a variable product, create a new product, or edit an existing one:
Navigate to: Seller dashboard-> Product and select either the Add new product button to create a new product or the or Edit button to choose an existing product from the displayed products list.
Step i. Set the product type
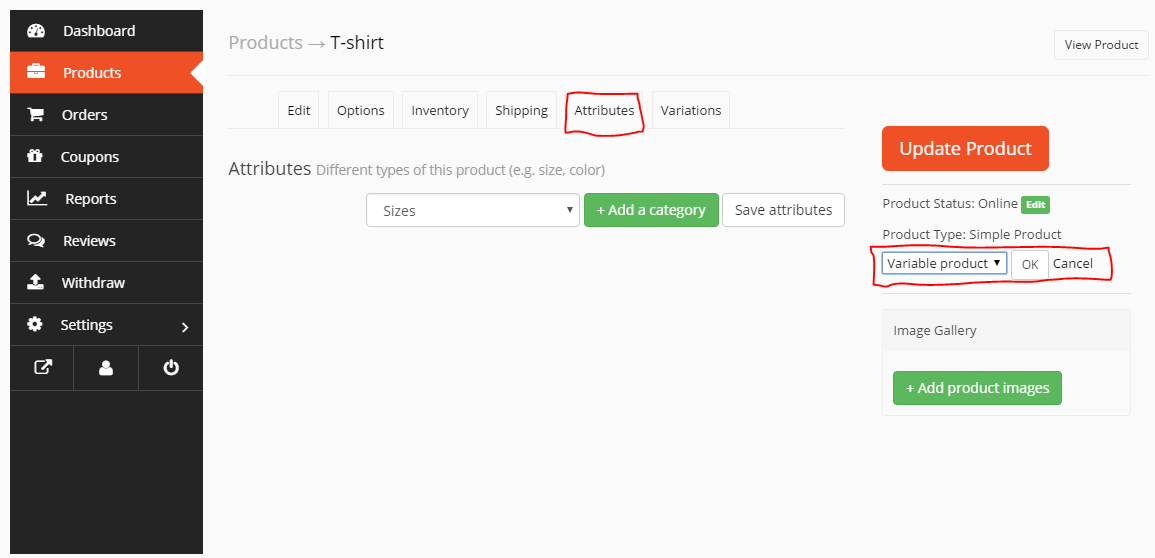
Select Variable product under Product type dropdown list and hit ok button.
Step ii. Add attributes to be used for variations
This action is divided into 3 steps as shown in the screenshot.

- Select the right attribute for your product from the dropdown or define a custom attribute specific to your product.
- Click on add a category
- Finally, check the Used for variationscheckbox before you click on save attributes.
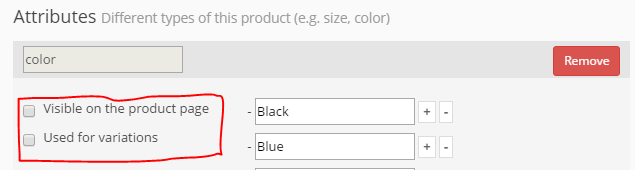
If you want the attributes to be visible on product page. Then, it is a good idea to also tick the visible on the product page checkbox
As an example, let us assume you wish to list a T-shirt, which you have in 4-different colours (Black, Blue, Green and White) and each colour in 4-different sizes (S, M, L, and XL). Then you have to add each attribute one after the other following the above described steps. After following the earlier instructions, you should get a page looking like this:
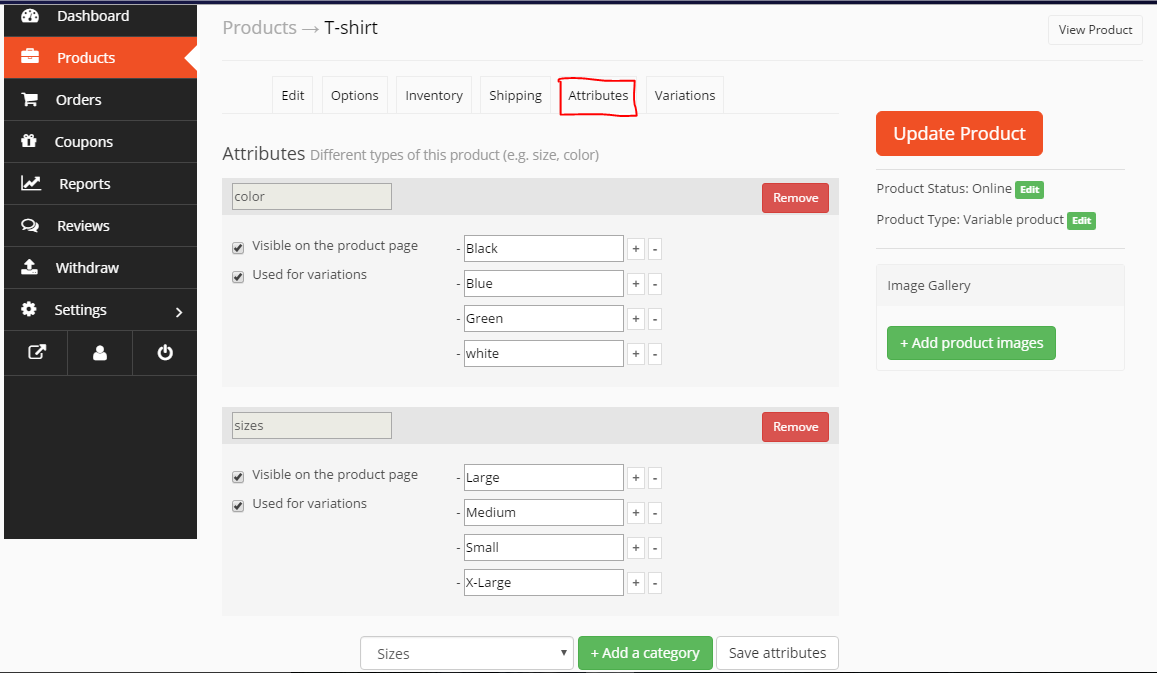
You can now progress to adding the variations
Adding variations
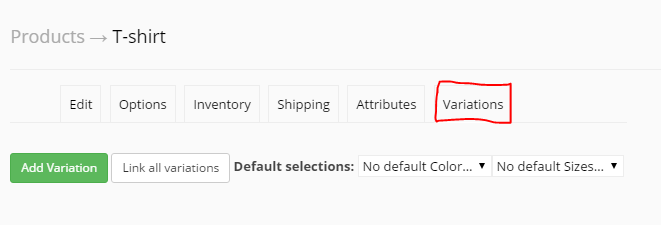
- Click on Add variation
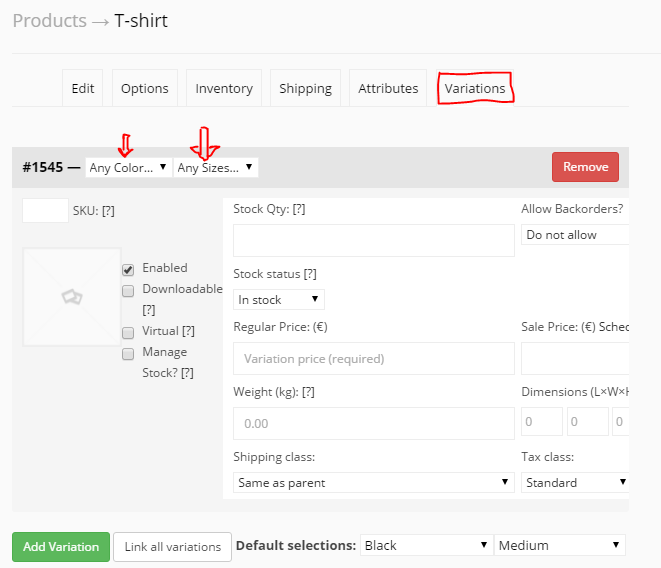
- Select attributes for your variation.
- Enter any available data. The only required field is the “Regular Price” field.
- Save changes using the Update Product button.
Setting Defaults

We recommend setting your preferred variations as defaults. In this screenshot for example, we have set the blue, medium size t-shirt as the default. What this means is; when a user visits the product’s page, he will see the medium sized blue T-shirt. This also enables the Add to Cart button to appear automatically on the variable product pages. However you may as well decide not to set defaults, this allows users to pick any colour and size right away from the product’s page. Although, you can only set defaults after at least one variation has been created.
Link all variations
You can add as many variations and attributes as you want. To create several variations using all your selected attributes, click on the link all variations button, then the system will automatically generate all possible combinations. Afterwards, you can add prices and other products details to those variations.
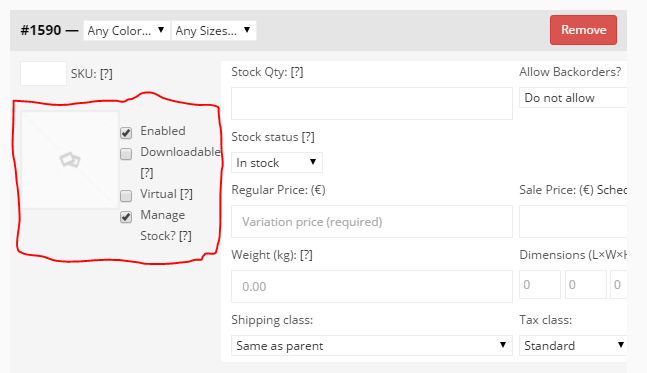
In the case that you wish to disable any variation, just uncheck the box on the left. On the same plane you can add product image, indicate whether the product is downloadable or not. You could also check the stock management box if needed.
Variation Data
Below are descriptions of all the terms you will see under variations tab.
- Enabled– Enable or disable the variation.
- Downloadable– Tells whether it is a downloadable variation.
- Virtual– If this product is not a physical or shippable product, shipping settings are removed.
- Regular Price(required) – Sets the price for this variation.
- Sale Price (optional) – Sets a price for this variation when on sale.
- Tax status— Taxable, shipping only, none.
- Tax class– Tax class for this variation. Useful when you are offering variations spanning different tax bands.
- Downloadable Files– Shows only if the Downloadableoption is selected. Add file(s) for buyers to download.
- Download Limit– Shows only if the Downloadableoption is selected. Sets how many times a buyer can download the file(s). Leave blank for unlimited.
- Download Expiry– Shows only if the Downloadableoption is selected. Sets the number of days before a download expires after purchase.
Inventory:
- SKU– If you use the SKUs, set the SKU or leave blank to use the product’s SKU.
- Manage Stock?– Manage stock at the variation level.
- Stock Quantity – Shows if Manage Stock is selected. Input the quantity of available stock for the specific variation or leave blank to use the product’s stock settings.
- Allow Backorders– Choose how to handle backorders.
- Stock Status– Set the status of your variation’s stock.
- Sold Individually?— Allow only one to be sold in an order.
Shipping:
- Weight– Weight for the variation, or left blank to use the product’s weight.
- Dimensions– Height, width and length for the variation, or left blank to use the product’s dimensions.
- Shipping class– The shipping class can affect shipping. Set this if it differs from the product’s shipping class.

